
RAW video is overrated. Here’s why
Nowadays, people put a lot of stock into "shooting RAW", apparently expecting something supernatural from the cherished format. It probably all came from photography, as many began their journey on DSLRs. 14-bit RAW photos and compressed 8-bit JPGs differed from each other so dramatically in terms of post-processing capabilities that we all somewhere hoped that sooner or later the video would be the same. So it may and will be, someday after the cancellation of the RED patent, but now in fact the difference between 10-bit 422 LOG and 12-bit RAW is not as significant as it might seem. In terms of post-processing, there is no magic in RAW, it is not a ladder to color grading heaven. There are a lot of myths around RAW video, and it’s high time to bust them.
Let’s stop repeating RAW Myths
"With RAW you can change ISO in post". No you can’t. As we discussed in previous article, A RAW file is always written in the native ISO of the camera, and the ISO values written to the metadata are essentially an exposure index (EI) that simply tells us what exposure the operator saw on the monitor at the time of shooting. So changing the ISO in post is just a gain slider. To be specific, changing the ISO in the Davinci Resolve RAW panel is exactly the same as turning the Offset wheel in LOG Wheels. There is no difference. And in terms of noise, the material reacts to these manipulations in exactly the same way as LOG. Therefore, RAW does not give carte blanche to expose "as necessary", on the contrary — you need to expose RAW, ideally, with a margin, which was again discussed in the previous article. RAW is not forgiving of exposure errors, as is LOG, it is not a suitable format for run-and-gun shooting.
"With RAW, you can change white balance in post." False again. White balance is the same gain function as ISO, only applied selectively to the red and blue channels earlier in the image chain. The white balance is already written to the RAW file, that's a fact. No camera can be simultaneously calibrated for all possible white balances. The camera has a "native" white balance, and for most cameras it's 5600K. Why? Because silicon is almost always more sensitive to the red end of the spectrum than the blue end. As a result, the sensor will typically produce the best image in light that has a lot of blue (to compensate for the lack of blue sensitivity) and not too much red. As always, there are exceptions, but the vast majority of cameras are daylight balanced.
When balanced at 3200K, the camera raises the blue channel gain and lowers the red gain to maintain dynamic range without getting too much noise in the red channel. This tuning occurs at the level of the ADC (analogue-to-digital converter) and cannot be disabled. Therefore, shooting in RAW does not eliminate the need for proper balancing. If you shot a scene with incandescent lights on a camera balanced at 5600K, then when you correct RAW in post, you are guaranteed to get noise in the blue channel. You can check this against a correctly balanced scene. Of course, the difference will not be colossal, but it will be visible on the instruments.
Therefore, RAW material has already been taken at a certain temperature, and all further manipulations with WB in the post are no different from the same LOG manipulations. How far you can go with these manipulations depends only on the color depth (bit depth), the degree of file compression and the noise level, in other words, on the quality of the image. RAW or not RAW — in this case it is not relevant at all. RAW is just an efficient way of recording information, not some new level of quality.
10-bit LOG can do it too
If you remember where LOG came from, you will find that curves such as ARRI LogC, Sony S-Log3, Canon S-Log2 are taken from the logarithm that Kodak used to scan film in the Cineon workflow. Before Alexa came along and took almost all filmmakers into an all-digital workflow, film was scanned in Cineon's 10-bit logarithm and worked with the so-called Digital Intermediate. Cineon then became DPX, and I assure you that you have seen dozens of amazing films, colored in 10 bits, and no one ever complained about color banding or whatnot.
Where, then, did such a reputation for RAW as something supernatural come from? It seems to me that this is due to processing tools and personal experience. Many self-taught filmmakers (which I count myself among) have had a bad first experience with LOG grading and a completely smooth experience with RAW video. It seems that you do the same manipulations, for example, with the same white balance, and LOG reacts weirdly, everything falls apart, and RAW reacts smoothly and magnificently. But with experience came the understanding that the matter is not in the recording format.
If you have trouble pushing LOG in the grade, you are doing it wrong
And by "wrong" I don't mean crooked hands, but the use of incorrect tools. RAW grading implies the presence of an appropriate debayer, without it you will not even be able to view the file. LOG in this sense is no different: to work correctly with it, you also need tools that recognize the color space and gamma curve of your camera (color-space aware tools). LOG color correction in REC709 space is a technical error.
I will give an example on material familiar to me with the Sony FX6. The camera shoots in S-Log3 gamut and S-Gamut3.cine space. I know only three correct ways to work with this material:
Color managed workflow. Color space management systems such as ACES and Davinci Color Management bring material from any camera to a common denominator in a 32-bit workspace. This is a kind of translator from the "camera-ish" to the "grading-ish" language. It makes sure that the color correction tools work the same way for footage shot in different color spaces and gamuts. In addition, it is also not destructive, unlike LUTs. Color management workflows are the future, but for now they still have a number of shortcomings that we will not go into now.
HDR wheels. Starting with version 17 of Resolve, in the HDR-wheels panel, you can (and should) specify the space and gamma of the file you are working with and - voila! Now the panel works just like RAW. In fact, this is basically local color management, if you want to apply it not to the entire project, but only to a specific node. The main thing is to make sure that it is BEFORE the node with the Color space transform or LUT. Before version 17, LOG-wheels was a more or less acceptable primary color correction tool, but the HDR toolbar is so powerful that I now use it exclusively. This is the closest you can get to "in-camera" settings other than RAW. And the difference is only in the scale of potential changes, and not in how they work.
Catalyst Browser. Native software from a manufacturer, in this case Sony, definitely works in the correct space. Who better than a camera manufacturer can be trusted to interpret the material? By moving the WB slider in the Catalyst Browse, the material behaves exactly like RAW. The problem with such packages, of course, is adding another stage of work — a kind of "pre-post-production". Personally, I detest these workflows, but they have a place to be. Similar "preparatory" programs have, for example, RED and Canon.
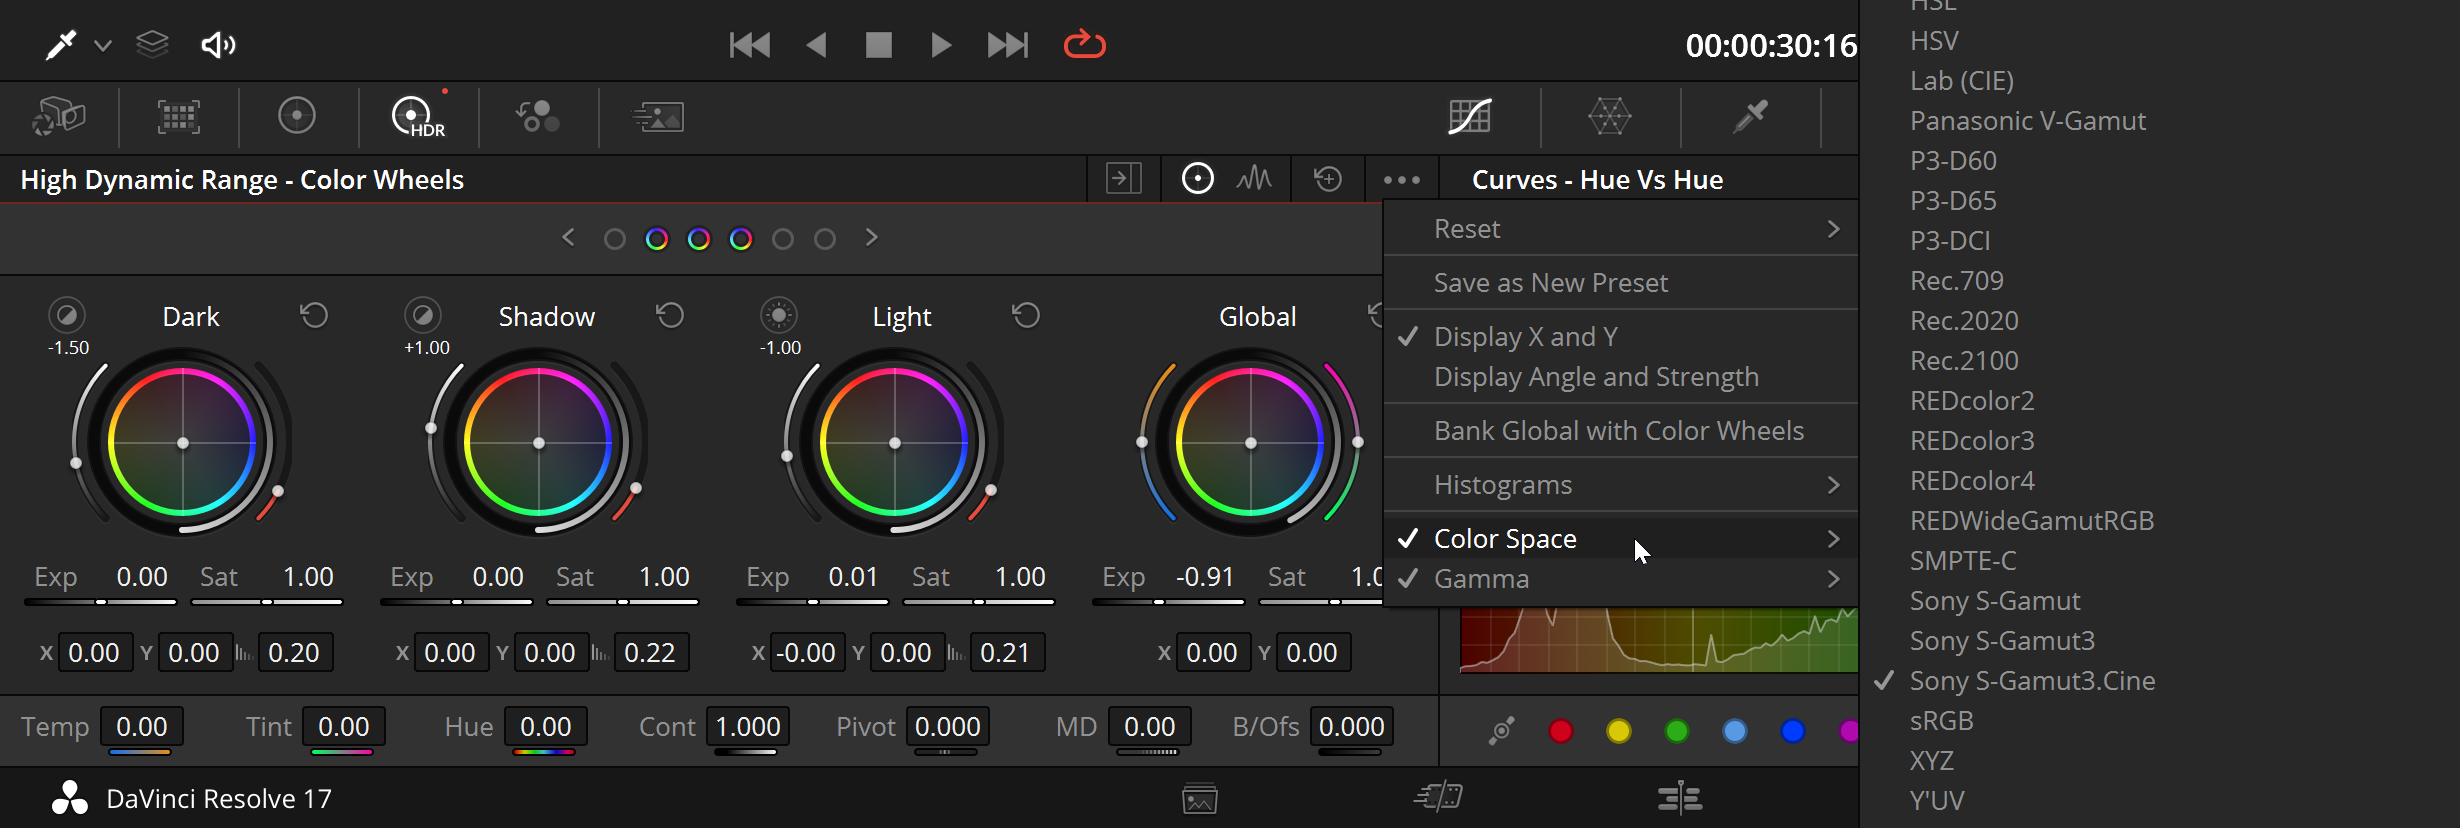
HDR wheels with correct gamma and color space selected give you a close approximation of in-camera exposure and WB settings.
And now to the point, which will surely meet some resistance: changing the white balance and LOG exposure in one of the three listed ways is no different from similar manipulations in the RAW panel. Both are manipulations with already written down information. Moreover, most RAW formats (except 16-bit linear) are recorded using a LOG curve. And the RAW panel converts this data into LOG, which then needs to be developed. In fact, you are working with LOG. Therefore, statements that LOG is somehow graded differently (unlike RAW) have no grounds.
The bad news is that it will not work correctly with LOG in programs without color management. I'm looking at you, Adobe Premiere. Largely due to the inability to work with color normally, I switched completely to Davinci Resolve a couple of years ago. In the 22nd version of Premiere, some kind of rudimentary color management appeared, but it worked awkwardly and without the ability to control it. For lovers of Premiere, all is not lost: there are plugins that can work in native color spaces and then convert them. For example, FilmConvert Nitrate.
It’s not the RAW, it’s the 12 bits
In practice, the difference between RAW and LOG is only in the color depth of the material. Due to the fact that the camera does not have to write three values for each pixel (Y, Cb, Cr), but only one (Y, i.e. luma), it significantly frees up bandwidth. Now it can be occupied with a more granular gradation of information - not 1024 values for each pixel, but 4096. And color subsampling for RAW is not required at all, because the camera does not have to “think” about the color of the pixels.
Of course, with 4 times as much information, a 12-bit image can withstand much more manipulation than a 10-bit one. But it's the bit depth, not the RAW-ness. Dozens and dozens of movies have been shot on the ARRI Alexa in ProRes 4444, which is a 12-bit LOG file that grades absolutely as well as RAW. The catch lies only in giant files that are 3 times larger than RAW of similar quality.
We tend to associate RAW with larger files, but RAW is actually much more memory-efficient (especially if it's intelligently compressed like RED RAW) than "color" codecs like ProRes. But even if the bandwidth of the memory card is not a bottleneck, then 12-bit color files are extremely hard on the processor. Let's remember, for example, the old Canon C200, which can write RAW, but cannot output 10-bit. Writing in RAW is easy for the camera, because it does not have to deal with debayering and noise reduction as much (there is always some). Therefore, in practice it often turns out that the maximum bit depth is available to us only in RAW. And that’s all the magic there is to it.
Conclusion
You probably noticed that I made a logical circle. Started against RAW and ended up praising RAW. Yes, RAW is a more efficient data recording format. If I plan to work with color in post, then ideally I would like to shoot in RAW. But this is due only to the compact packaging of information with a higher bit depth, and not to the "ability to change ISO and WB on post", which in fact is another fake postulate hammered into our heads by YouTubers.
There is no magic in RAW, it is not "pure sensor data", but the same image, only requiring preliminary interpretation for viewing. And as for the image, the same shooting rules apply to it — the correct exposure and white balance are still mandatory. RAW is not a carte blanche to shoot at random and not a lifesaver in post. With equal bit depth, the RAW status of the file does not affect its suitability for grading. RAW is just a way to cram more information into the same file size.
But while the RED patent is holding, we will not see RAW video as a standard in other manufacturer’s cameras. And in the meantime, I will happily shoot and grade in 10 bits.